Check Point Threat Prevent
What is MCP?
Model Context Protocol (MCP) servers expose a structured, machine-readable API for your enterprise data—designed for AI-powered automation, copilots, and decision engines. By delivering a clear, contextual slice of your security environment, MCP lets you query, analyze, and optimize complex systems without building custom SDKs or parsing raw exports.
Why MCP for Security?
Security Policies often span hundreds of rules and thousands of objects across diverse enforcement points. Understanding, auditing, or optimizing these environments is slow and error-prone. MCP changes this: exposing security management data in a modular, context-rich format, ready for AI systems to consume. Enabling the AI to use your data with precision. Ask real-world questions, and get structured, actionable answers—instantly.
Features
- Threat Protection Management: Query and analyze threat protections, profiles, and indicators
- IPS (Intrusion Prevention System) Monitoring: Check IPS status, update schedules, and protection attributes
- IOC Feed Management: View and analyze threat intelligence feeds and indicators of compromise
Management API Version
This server supports Management API v2.1 (R82.10+). It is generally compatible with earlier versions; some parameters may not be available on older management servers.
Demo
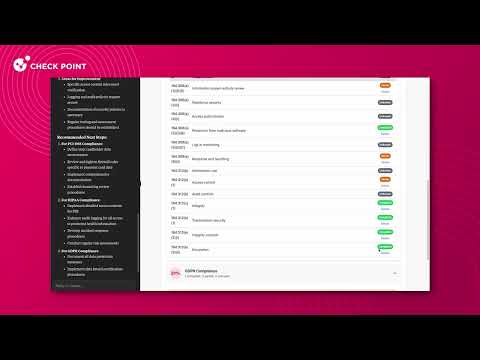
Example Use Cases
Threat Protection Analysis
"Show me all high-severity threat protections currently active on my network"
→ Analyzes threat protection configurations and provides detailed security coverage insights.
CVE Vulnerability Assessment
"Check if CVE-2024-1234 is protected across all my gateways"
→ Performs comprehensive CVE protection analysis across gateway policies and threat profiles.
IPS Health Monitoring
"What's the current IPS status and when was the last signature update scheduled?"
→ Provides real-time IPS blade status, update schedules, and protection database information.
Threat Intelligence Review
"List all active IOC feeds and show indicators for ransomware threats"
→ Displays threat intelligence feeds, indicators of compromise, and their operational status.
Exception Analysis & Security Gaps
"Show all threat rule exceptions and identify potential bypass vulnerabilities"
→ Reviews exception groups and rules to highlight areas where threats might evade protection.
Gateway Security Posture Assessment
"Which gateways have threat prevention enabled and what protection profiles are active?"
→ Comprehensive view of gateway threat prevention configurations and policy assignments.
Threat Rulebase Optimization
"Analyze my threat prevention rules and suggest improvements for better coverage"
→ Examines threat layers, rules, and profiles to recommend security enhancements.
Configuration Options
📊 Anonymous Usage Statistics: Check Point collects anonymous usage statistics to help improve this MCP server. To opt out, set
TELEMETRY_DISABLED=trueor use--no-telemetryflag.
This server supports two main modes of authentication:
1. Smart-1 Cloud (API Key)
Authenticate to Check Point Smart-1 Cloud using an API key.
- How to generate an API key:
In your Smart-1 Cloud dashboard, go to Settings → API & SmartConsole and generate an API key.
Copy the key and the server login URL (excluding the/loginsuffix) to your client settings.

Set the following environment variables:
API_KEY: Your Smart-1 Cloud API keyS1C_URL: Your Smart-1 Cloud tenant "Web-API" URL
2. On-Prem Management (API Key or Username/Password)
-
Configure your management server to allow API access:
To use this server with an on-premises Check Point management server, you must first enable API access.
Follow the official instructions for Managing Security through API. -
Authenticate to the Security Management Server using either an API key or username/password:
- Follow the official instructions: Managing Administrator Accounts (Check Point R81+)
- When creating the administrator, assign appropriate permissions for API access and management operations.
- You can authenticate using an API key (recommended for automation) or username/password credentials.
Set the following environment variables:
MANAGEMENT_HOST: IP address or hostname of your management serverPORT: (Optional) Management server port (default: 443)API_KEY: Your management API key (if using API key authentication)USERNAME: Username for authentication (if using username/password authentication)PASSWORD: Password for authentication (if using username/password authentication)
Client Configuration
Prerequisites
Download and install the latest version of Node.js if you don't already have it installed.
You can check your installed version by running:
node -v      # Should print "v20" or higher
nvm current  # Should print "v20" or higher
Supported Clients
This server has been tested with Claude Desktop, Cursor, GitHub Copilot, and Windsurf clients.
It is expected to work with any MCP client that supports the Model Context Protocol.
Note: Due to the nature of management API calls and the variety of server tools, using this server may require a paid subscription to the model provider to support token limits and context window sizes.
For smaller models, you can reduce token usage by limiting the number of enabled tools in the client.
Smart-1 Cloud Example
{
  "mcpServers": {
    "threat-prevention": {
      "command": "npx",
      "args": ["@chkp/threat-prevention-mcp"],
      "env": {
        "API_KEY": "YOUR_API_KEY",
        "S1C_URL": "YOUR_S1C_URL" // e.g., https://xxxxxxxx.maas.checkpoint.com/yyyyyyy/web_api
      }
    }
  }
}
On-Prem Management Example
{
  "mcpServers": {
    "threat-prevention": {
      "command": "npx",
      "args": ["@chkp/threat-prevention-mcp"],
      "env": {
        "MANAGEMENT_HOST": "YOUR_MANAGEMENT_IP_OR_HOST_NAME",
        "MANAGEMENT_PORT": "443", // optional, default is 443
        "API_KEY": "YOUR_API_KEY", // or use USERNAME and PASSWORD
        "USERNAME": "YOUR_USERNAME", // optional
        "PASSWORD": "YOUR_PASSWORD"  // optional
      }
    }
  }
}
Set only the environment variables required for your authentication method.
Multi-Domain Server (MDS)
On a Multi-Domain Server, the server logs in to the System Domain and you choose a domain per request, for example "show the hosts in domain Europe".
If your credentials have no System Domain access, set MANAGEMENT_DOMAIN (or pass --management-domain) to the domains they can access, separated by commas. The server logs in to the first domain and uses it when a request names no domain. Such credentials cannot list the system's domains, so the list is how the assistant knows which other domains it can offer; any domain your credentials can access works when you name it.
"env": {
  "MANAGEMENT_HOST": "YOUR_MDS_IP_OR_HOST_NAME",
  "MANAGEMENT_DOMAIN": "DOMAIN_1,DOMAIN_2", // only when you have no System Domain access
  "API_KEY": "YOUR_API_KEY"
}
Configuring the Claude Desktop App
Using a Bundled MCPB (formerly DXT)
- Download the MCPB file: 📥 threat-prevention.mcpb
- Open Claude Desktop App → Settings → Extensions
- Drag the MCPB file and configure per the instructions.
Or Configure Manually
For macOS:
# Create the config file if it doesn't exist
touch "$HOME/Library/Application Support/Claude/claude_desktop_config.json"

# Open the config file in TextEdit
open -e "$HOME/Library/Application Support/Claude/claude_desktop_config.json"
For Windows:
code %APPDATA%\Claude\claude_desktop_config.json
Add the server configuration:
{
  "mcpServers": {
    "threat-prevention": {
      "command": "npx",
      "args": ["@chkp/threat-prevention-mcp"],
      "env": {
        // Add the configuration from the above instructions
      }
    }
  }
}
VSCode
Enter VSCode settings and type "mcp" in the search bar. You should see the option to edit the configuration file. Add this configuration:
{
  ...
  "mcp": {
    "inputs": [],
    "servers": {
      "threat-prevention": {
        "command": "npx",
        "args": [
          "@chkp/threat-prevention-mcp"
        ],
        "env": {
          "MANAGEMENT_HOST": "YOUR_MANAGEMENT_IP_OR_HOST_NAME",
          "MANAGEMENT_PORT": "443",  // optional, default is 443
          "API_KEY": "YOUR_API_KEY", // or use USERNAME and PASSWORD
          "USERNAME": "YOUR_USERNAME", // optional
          "PASSWORD": "YOUR_PASSWORD" // optional
        }
      }
    }
  },
  ...
}
Windsurf
Enter Windsurf settings and type "mcp" in the search bar. You should see the option to edit the configuration file. Add the configuration as Claude Desktop App.
Cursor
Enter Cursor settings and click on "MCP Servers" in the left menu. You should see the option to add a new MCP Server. Add the configuration as Claude Desktop App.
HTTP Transport
By default, this server uses stdio transport, which is the standard mode for MCP clients like Claude Desktop and Cursor. For hosted or multi-user deployments, an HTTP transport (MCP Streamable HTTP) is also available.
Security notice before you continue: The HTTP server has no built-in authentication and no TLS. Any client that can reach the port can establish a session, and credentials travel in cleartext. Only use HTTP transport behind an authenticated reverse proxy (nginx, Caddy, a cloud load balancer) that terminates TLS and enforces authentication. If you are running the server on the same machine as your MCP client, use the default stdio transport — it has none of these concerns.
Starting the server in HTTP mode
MCP_TRANSPORT_TYPE=http MCP_TRANSPORT_PORT=3000 npx @chkp/threat-prevention-mcp
# or
npx @chkp/threat-prevention-mcp --transport http --transport-port 3000
The server exposes:
POST/GET/DELETE /mcp— MCP protocol endpointGET /health— server status (active session count, version)
Connecting an MCP client
Point your MCP client at http://<host>:3000/mcp. Example for Claude Desktop (claude_desktop_config.json):
{
  "mcpServers": {
    "threat-prevention": {
      "url": "http://localhost:3000/mcp"
    }
  }
}
Development
Prerequisites
- Node.js 20+
- npm 10+
Setup
# Install all dependencies
npm install
Build
# Build all packages
npm run build
Running Locally
You can run the server locally for development using MCP Inspector or any compatible MCP client.
node FULL_PATH_TO_SERVER/packages/threat-prevention/dist/index.js --s1c-url|--management-host --api-key|--username|--password
⚠️ Security Notice
- Authentication keys and credentials are never shared with the model. They are used only by the MCP server to authenticate with your Check Point management system.
- Only use client implementations you trust. Malicious or untrusted clients could misuse your credentials or access data improperly.
- Management data is exposed to the model. Ensure that you only use models and providers that comply with your organization's policies for handling sensitive data and PII.
📊 Telemetry and Privacy
Anonymous Usage Statistics: Check Point collects anonymous usage statistics to improve this MCP server. Only tool usage patterns and anonymous identifiers are collected—no credentials, policies, or sensitive data.
Opt-Out: Set TELEMETRY_DISABLED=true environment variable or use the --no-telemetry flag to disable telemetry collection.