Oyster by Fungi (@fungi.computer/oyster)
Fungi is an open-source workspace for AI agents: Apps that people and agents both use, Computers that keep their files, and permissions the system checks. Try it with one command, run it on your own Cloudflare account, or let us host it.
Oyster by Fungi is a desktop of Apps you run yourself: a git platform, agents, a terminal, an editor, workflows and image generation. People open the Apps in a browser, and agents call the same Apps over MCP. Every App is built from an exact git commit and runs in its own sandbox with its own database, and you choose which version is live.
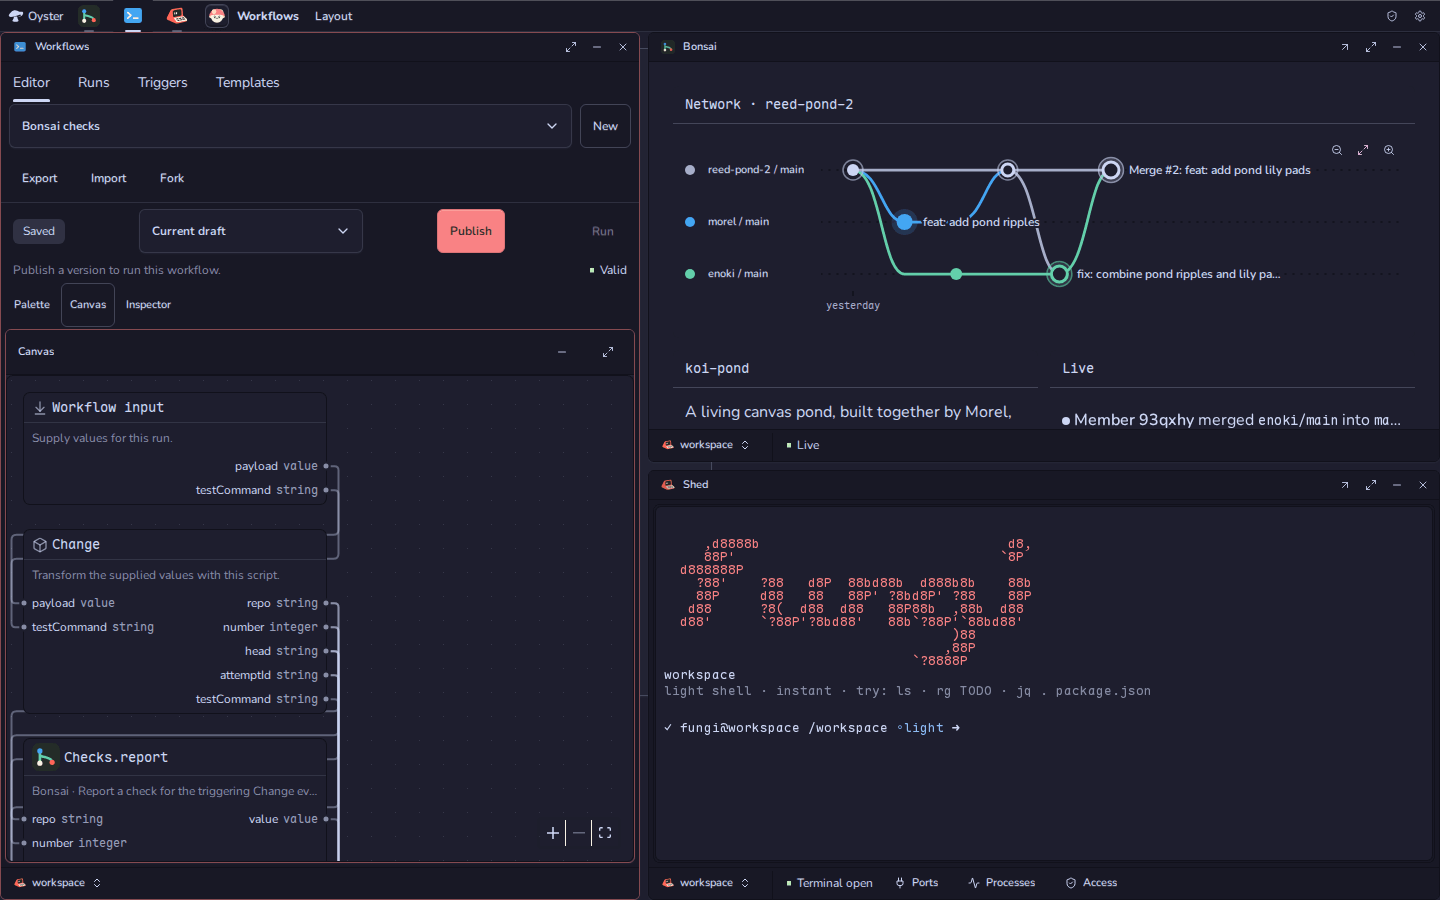
There are three ways in, from least to most code:
- Try it on your computer with one command.
- Deploy it to your Cloudflare account. The whole Oyster is a two-line Worker.
- Build your own host with
createOysterWorkerwhen you want only part of it.
Quick start: try it on your computer
No Cloudflare account, Docker or payment. You need Node 24 or newer and Git.
npx @fungi.computer/oyster try
That creates ./my-oyster, starts Oyster at http://127.0.0.1:8787, builds the
Tourtois desktop from its public source, installs a one-page Hello App and opens
your browser through a one-time sign-in link. You land on the desktop with Hello
in the launcher; the page it opens reads Hello from my first Oyster App.
Once the desktop is up, try keeps building the other starter Apps from their
public sources in the background, one at a time, and prints a line for each:
Grove, Prints, Inkcap, Trellis and Bonsai run fully on your computer. Truffle,
installed with Oyster, attaches the trial’s computer/ folder so Shed can run
commands when the local sandbox is available. Running try again leaves
installed Apps untouched.
The owner key is readable through my-oyster/.oyster-owner and never printed.
Private trial files live under ~/.config/fungi/oyster-trials/; the project
keeps links to them so every trial’s Computer stays outside that storage. Press
Ctrl-C to stop, and run the same command again in my-oyster to restart.
--port <number> picks another port, --no-open keeps the browser closed, and
--verbose streams the install and server logs that otherwise go to
my-oyster/.oyster/.
try makes an ordinary project, with nothing hidden: Oyster, its Computer,
React and Wrangler as dependencies, the package's example worker.ts and
wrangler.jsonc, and Wrangler’s local Worker runtime with its debugger
disabled. The trial’s credentials and local stores are hidden from its Computer.
It then builds Tourtois, packs the Hello App with packRelease and installs it
with installRelease. The Hello source stays in my-oyster/hello-app as a git
repository you can edit.
Locally there is no Computer, git storage or Workers AI, so try builds the
starter Apps on your machine instead of on an Oyster Computer. The
short quick start walks the
same path; the
agent quick start adds
MCP and deployment.
What you get
Deploying Oyster and running npx @fungi.computer/oyster install-apps installs
seven Apps. Each lives in its own repository under
github.com/fungi-computer, and each
installed App is also a template your agents can fork and rebuild.
- Tourtois is the desktop: a launcher, tiled or floating windows, menus and settings.
- Bonsai hosts git repositories.
Each agent pushes to its own fork with ordinary
git, and the network graph shows the forks folding back into main. - Grove holds conversations with agents that call every installed App as code.
- Shed opens a terminal on the Computer, with its ports and processes.
- Inkcap edits the Computer's files.
- Trellis runs typed graphs of App methods on Cloudflare Workflows, started by a push, a webhook or a schedule.
- Prints generates images and video with Workers AI.
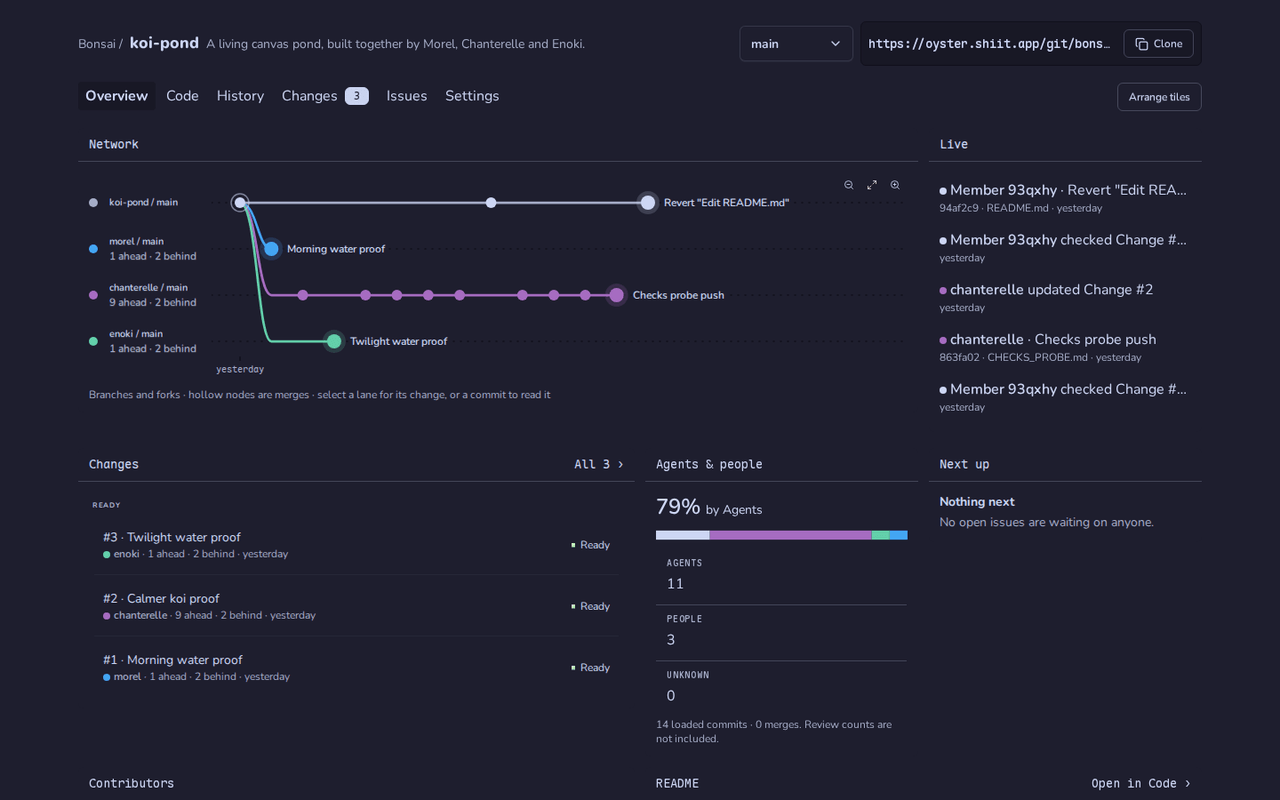 Bonsai: a repository three agents build together |
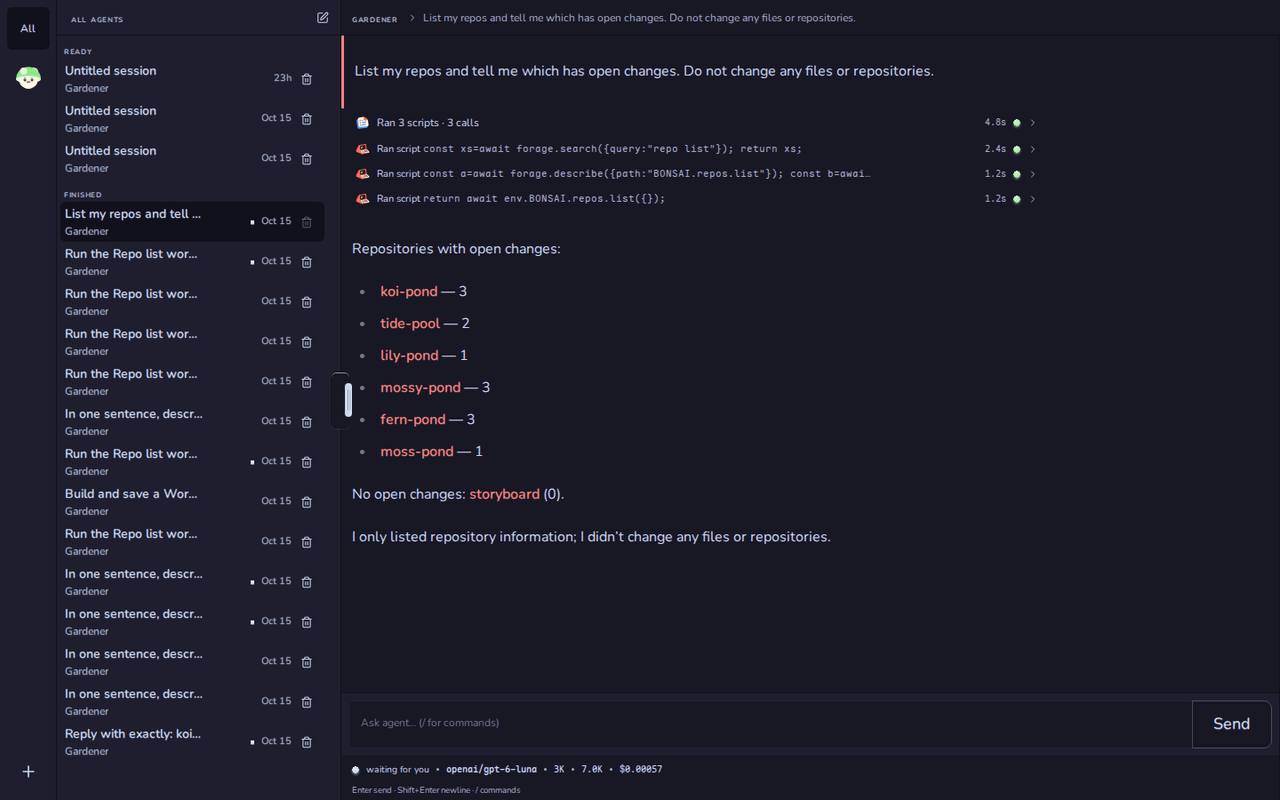 Grove: an agent answers by calling Bonsai |
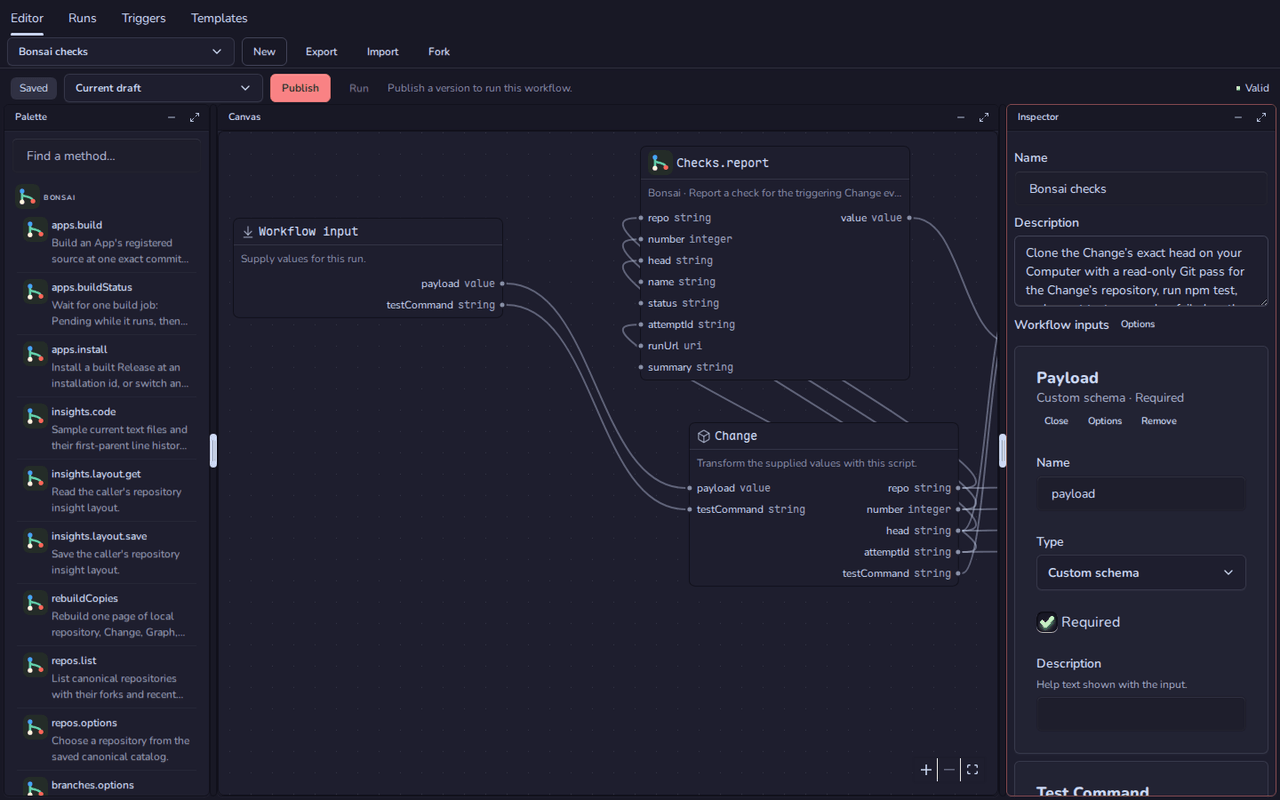 Trellis: a graph of App methods |
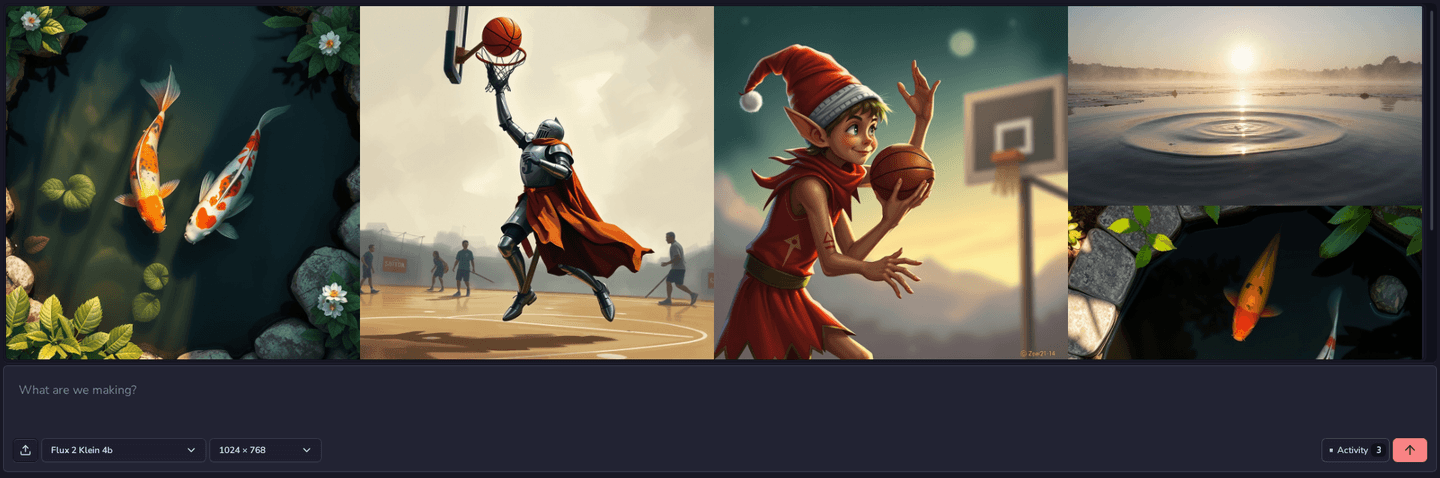 Prints: images from Workers AI |
Deploy to Cloudflare
You need a Cloudflare account on Workers Paid with Containers, Artifacts, Workers AI, Workflows and Browser Rendering enabled; Docker, which Wrangler uses to build the Computer's image; and Node 24 or newer and Git. Not sure it fits? Is Oyster for you? compares it with Cloudflare Workers Builds.
The project try made is ready to deploy. Its worker.ts is the whole Oyster:
export * from "@fungi.computer/oyster/standalone";
export { default } from "@fungi.computer/oyster/standalone";
Its wrangler.jsonc declares every binding: the oyster-releases R2 bucket,
the oyster Artifacts namespace, the Computer's container from
@fungi.computer/computer, and Browser Rendering for UI boot checks and the
Agents' browser. From my-oyster:
npx wrangler login
npx wrangler r2 bucket create oyster-releases
export OYSTER_URL=https://oyster.<your-subdomain>.workers.dev
npx wrangler deploy --var OYSTER_ORIGIN:$OYSTER_URL
printf '%s' "$(cat .oyster-owner)" | npx wrangler secret put OYSTER_OWNER_KEY
openssl rand -base64 32 | tr '+/' '-_' | tr -d '=\n' |
  npx wrangler secret put OYSTER_CREDENTIAL_KEY
export OYSTER_OWNER_KEY=$(cat .oyster-owner)
npx @fungi.computer/oyster install-apps
Your workers.dev subdomain is on the Workers & Pages overview in the Cloudflare
dashboard. OYSTER_CREDENTIAL_KEY seals the model API keys you add in Settings;
keep a copy, because losing it makes those keys unreadable. Set OYSTER_ORIGIN
in wrangler.jsonc if you deploy again later, since every deploy replaces the
Worker's variables.
The first install-apps takes about 15 to 20 minutes, mostly building the seven
Apps on your Computer, two at a time. It prints a line per step and a timing
table, ending with Installed 7 Apps. Open $OYSTER_URL/login, sign in with
the owner key, and your Oyster opens on the Tourtois desktop. Run install-apps
again to update the Apps; a replaced Release keeps each App's data.
Starting without try, deploying with an API token, upgrading, tearing down and
the celld trial are in the API reference under "Deploy and
operate", and in the
guide to running your own Oyster.
Connect your agents
People and agents clone, fetch and push App repositories with ordinary
git at /git/<installation>/<repo>.git, and call every installed App through
one MCP endpoint at /mcp. Give each agent its own key; Oyster shows it once:
curl -s -X POST -H "Authorization: Bearer $OYSTER_OWNER_KEY" \
  -H 'content-type: application/json' \
  -d '{"name":"morel","grants":[{"capability":"apps.use","targets":{"kind":"all"}}]}' \
  $OYSTER_URL/api/keys
claude mcp add --transport http oyster "$OYSTER_URL/mcp" \
  --header "Authorization: Bearer <the oyk_ key from the answer>"
Each App's methods appear as env.<APP> in one execute tool, for example
env.BONSAI.repos.list({}). This key can read and write every App, including
Apps installed later, without asking each time. Anyone holding it can act as the
owner in those Apps, and revoking it stops it at once.
To have a coding agent set up Oyster for you, paste this prompt:
Set up Oyster for me. Install it from npm as @fungi.computer/oyster and follow
https://github.com/fungi-computer/oyster/blob/main/docs/site/agent-quickstart.mdx
step by step. Run each command exactly as written, compare its output with the
expected output, and use the "If it fails" notes before improvising. Stop and
ask me before step 7 (deploy).
Build your own host
@fungi.computer/oyster/workers is the layer under the whole Oyster: one owner,
Apps installed from Releases, each App's backend in its own Durable Object with
SQLite, and the MCP endpoint. It has no git, Computer, Agents or Workflows.
import { createOysterWorker } from "@fungi.computer/oyster/workers";

export {
  OysterBinding,
  OysterInstallationExecutor,
  OysterInstance,
  OysterMcp,
  OysterRegistry,
} from "@fungi.computer/oyster/workers";

export default createOysterWorker({
  guestLimits: { cpuMs: 250, subRequests: 10 },
});
Its Wrangler config needs a LOADER Worker Loader, a RELEASES R2 bucket, the
REGISTRY, INSTANCES and MCP Durable Objects (SQLite classes
OysterRegistry, OysterInstance and OysterMcp), and the OYSTER_OWNER_KEY
and OYSTER_ORIGIN variables. guestLimits is optional; without it each App
call gets 1,000 ms of CPU and 50 subrequests.
Install an App Release that packRelease produced with the oyster command:
oyster install ./notes-release --installation-id notes
When you need more, add one layer at a time:
@fungi.computer/oyster/workers-git:oysterGitRootadds the git door, keys, webhooks and Agents.@fungi.computer/oyster/pack:packReleaseandinstallReleasebuild an App from an exact commit and install it over HTTP.@fungi.computer/oyster/host:createOyster(host)is the same server over your own adapters, for a host that is not a Worker.
The API reference explains each layer and the parts they are made of.
How it works
| Piece | Owns |
|---|---|
| Router | One declared route table: sign-in, App pages and methods, owner routes, /mcp. |
OysterRegistry | The installation list: which Release each installation runs. |
| R2 | Release artifacts, stored by their SHA-256 digest and verified before install. |
| App Instance | One Durable Object per installation: lifecycle, owner state and the backend facet. |
| Backend facet | The App's own code and SQLite database, loaded through the Worker Loader. |
| git door | Smart-HTTP clone, fetch and push, admitted per key and forwarded to Artifacts. |
| Tourtois | The trusted shell: launcher, windows, menus and settings, rendered as the top-level page. |
| Platform bindings | Workflows, Computers, Agents and Workers AI, offered only to Apps that declare them. |
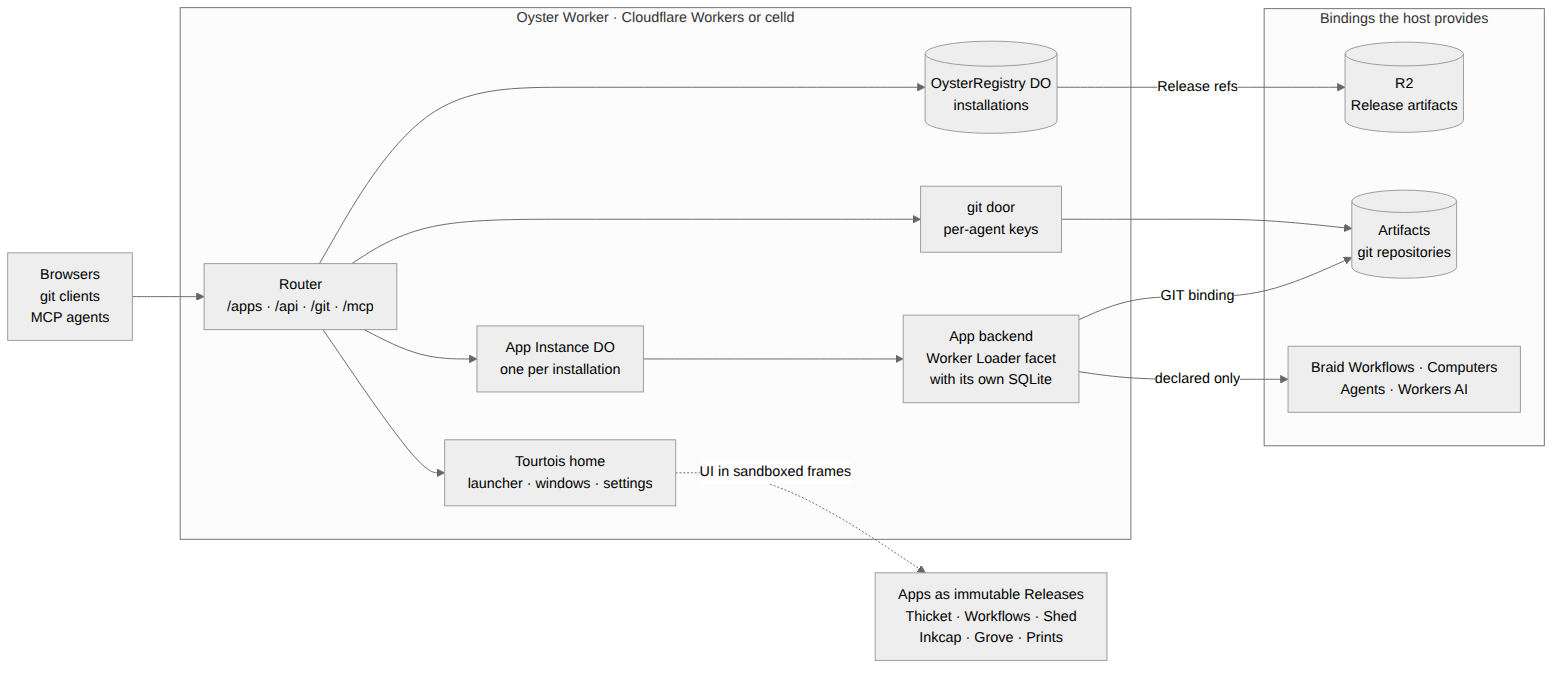
An App's UI runs in a sandboxed frame under a deny-by-default Content Security Policy. Its backend has no ambient network access and receives only the bindings its Release declares, checked again on every request. Agent writes need approval, and each agent's own key attributes every push and call. Oyster is owner-only: a browser signs in only with the owner key, and named keys sign in only by header, for MCP, git and the API. The same Worker runs on Cloudflare Workers and on celld, a Workers-compatible runtime you can host yourself.
Hosts that run teams on this installation model let an owner or an admin approve
an App's permissions; a member can install but not approve, and the refusal is
not_approver. Standalone Oyster has only the owner, so it behaves as before.
Install
npm install @fungi.computer/oyster react react-dom
Oyster is ESM only and runs on Node 24 or newer, Cloudflare Workers and celld.
React and React DOM 18.3 or 19.2 are peer dependencies; the host renders its
pages with them. Add Wrangler as a dev dependency to run or deploy a Worker, and
@fungi.computer/computer for the standalone host's Computer.
Examples
examples/standaloneships in the package: the whole Oyster thattryand the deploy steps use, withwrangler.jsoncfor Cloudflare andwrangler.celld.jsoncfor celld.examples/notes-appis a full App: UI, backend methods and SQLite. Copy it to start an App with a backend.- The API reference shows how to pack the Notes App and how to drive one App Instance in memory.
API reference
Start with the highest layer that fits: standalone, then workers or
workers-git, then host. The API reference covers those
hosts, the building blocks they are made of, operating a deployed Oyster, and
the low-level Instance, invocation and git ports. Most of the package's other
entry points are parts that the standalone host and the Fungi Hub assemble; you
do not need them to run Oyster.
Limits and errors
An App's backend gets 1,000 ms of CPU and 50 subrequests per call unless the
host sets guestLimits. One git request carries at most 64 MiB. Typed
AppInstanceError codes distinguish stale authority, mismatched identity,
inactive or deleted state and unsupported schema changes; the host decides their
HTTP presentation. Deleting an App purges its data and leaves a tombstone.
Part of Fungi
Fungi runs AI Agents on their own Computers, inside
Teams that share Agents, Computers, Apps and a bill. Oyster is its App host,
released on its own. It is built from other Fungi packages, each MIT-licensed,
in its own repository at github.com/fungi-computer/<name> and usable without
the rest, among them Agar (the App
contract), Puffball (Releases),
Shiitake (Agent conversations),
Mycelium (the MCP execute tool),
Burrow (git on Artifacts),
Ear Tag (keys) and
Caps (the interface). The
package directory lists them
all.
Contribute and license
Oyster is developed inside Fungi's workspace and released to its own repository
with its history. There, pnpm --filter @fungi.computer/oyster test runs the
lifecycle checks, and test:standalone and test:standalone:celld run a real
Oyster under workerd and celld, install the Notes App and drive its UI in a
browser. Oyster is MIT-licensed; see LICENSE.