@gapi (英语)

很简单 图QL API 框架建立在NodeJS上方,灵感来自 @ 安戈尔
以 翻译: - 在浏览器和节点内工作的被动延伸依赖注射容器
创建是为了以最小的努力提供复杂的后端可缩放的应用程序.
问题/问题可写票 这里
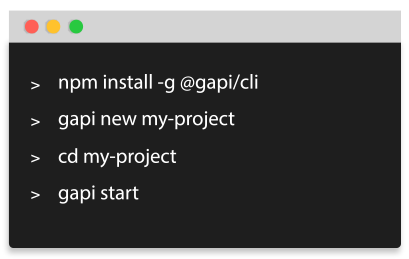
启动项目时间不足1分钟 差距-CLI
赫鲁克准备好了!

基本启动器 heroku Easy 部署按钮!
亚马逊服务器Less准备!
用于Gapi不存在的部分框架和技术:love letter:
IoC Contrains是可以在编程语言之外工作的DI框架. 在有些操作中, 您可以配置元数据文件中要使用的操作 (如XML),其入侵性较弱. 有的你可以做IoC,这通常是不可能的,比如在点点处注入一个执行.
-
指针 - 面向内容的计算机编程
高级起步器示例和生产构建
视频教学
开始一些解释的教程
简易启动器-2-mins-安装与cli
高级启动器-2-mins-Installation with-cli
启动 graphql 服务器( DOCKER)
在2分钟内与 Workers (DOCKER) 启动 graphql 服务器
综合外部模块:
@ Gapi- Typescript- 组合
@ Gapi- Angular- 客户端
@Gapi-Amqp-PubSub (英语) (内部)
@ Gapi- One- signal- 通知
@ Gapi- Sequelize (英语)
@ Gapi- voyager (英语)
安装和基本实例:
要安装此库, 请运行 :
npm install @gapi/core
最简单的 Gapi 服务器
import { CoreModule } from '@gapi/core';
import { Controller, Module, Bootstrap } from '@rxdi/core';
import { Query, Type } from '@rxdi/graphql';
import { GraphQLObjectType, GraphQLInt, GraphQLNonNull } from 'graphql';

export const UserType = new GraphQLObjectType({
  name: 'UserType',
  fields: () => ({
    id: {
      type: GraphQLInt,
    },
  }),
});

@Controller()
export class UserQueriesController {
  @Type(UserType)
  @Query({
    id: {
      type: new GraphQLNonNull(GraphQLInt),
    },
  })
  findUser(root, { id }, context): UserType {
    return { id: id };
  }
}

@Module({
  imports: [CoreModule.forRoot()],
  controllers: [UserQueriesController],
})
export class AppModule {}

Bootstrap(AppModule).subscribe();
您需要创建 tsconfig.json 以下内容
{
  "compilerOptions": {
    "emitDecoratorMetadata": true,
    "experimentalDecorators": true
  }
}
执行
ts-node index.ts
或执行以下命令来设置运行时间的这些选项 :
export TS_NODE_COMPILER_OPTIONS='{"experimentalDecorators": true, "emitDecoratorMetadata": true}' &&
ts-node index.ts --compilerOptions $TS_NODE_COMPILER_OPTIONS
要添加配置点击 这里
图克勒联合会
https://github.com/斯特拉迪瓦里奥/加皮/树木/主机/包件/federation
import { FederationModule } from '@gapi/federation';
import { Bootstrap } from '@rxdi/core';

Bootstrap(
  FederationModule.forRoot({
    port: 4000,
    willSendRequest({ request, context }) {
      request.http.headers.set('authorization', context.headers.authorization);
    },
    serviceList: [
      { name: 'accounts', url: 'http://localhost:9000/graphql' },
      { name: 'products', url: 'http://localhost:9001/graphql' },
    ],
  }),
).subscribe(() => console.log('started'));
或者说
import { ApolloServer } from 'apollo-server';
import { ApolloGateway, RemoteGraphQLDataSource } from '@apollo/gateway';

const serviceList = [
  {
    name: 'accounts',
    url: 'http://localhost:9000/graphql',
  },
];

class AuthenticatedDataSource extends RemoteGraphQLDataSource {
  willSendRequest({ request, context }) {
    request.http.headers.set('authorization', context.authorization);
  }
}
const gateway = new ApolloGateway({
  serviceList,
  buildService: ({ url }) => new AuthenticatedDataSource({ url }),
  __exposeQueryPlanExperimental: true,
});

(async () => {
  const server = new ApolloServer({
    gateway,
    engine: false,
    context: ({
      req: {
        headers: { authorization },
      },
    }) => ({ authorization }),
    subscriptions: false,
  });

  const { url } = await server.listen({ port: 4000 });
  console.log(`🚀 Apollo Gateway ready at ${url}`);
})();
带CLI
下一个使用 CLI 创建工程, 或者在您自定义应用程序上方读取
填补空白i
首先,我们需要在全球安装ts-node和Nodemon
npm install -g nodemon ts-node
使用 npm 在全球安装下个空隙
npm install @gapi/cli -g
要跳过以下步骤创建工程和从零开始的拖曳,您可以输入以下命令:
它可能需要20秒,因为它会安装项目依赖性.

基本项目
gapi new my-project

高级工程
gapi new my-project --advanced

微服务项目
要通过 CLI 类型从零开始创建带有微观服务的新基础项目:
gapi new my-project --microservices

无服务器基本工程
通过 CLI 类型创建新的没有 ORM 的基本服务器工程 :
gapi new my-project --serverless

无服务器高级工程
要通过 CLI 类型从头创建新的无服务器续集项目 :
gapi new my-project --serverless-sequelize
输入我的项目和类型 :
npm start
打开浏览器到
http://localhost:9000/altair
测试
要从测试 GAPI 开始开发, 需要使用 JEST 和 @gapi/cli 预配置 ! )
要运行单一测试类型 :
gapi test
测试表模式
注意: 在运行测试前需要启动服务器
注意: 每次您更改服务器时, 它会重新启动服务器并执行测试
注意: 要添加更多的测试, 只需在应用程序内某处创建 e2e. spec.ts 或 unit. spec.ts
启动应用程序
gapi start
用 -- watch 参数执行测试
gapi test --watch
你会遇到这样的事情

测试前自定义逻辑( 例如在测试前创建 MOCK 用户到数据库)
使用此内容在 root/ src/ test. ts 内创建文件测试( t)
每次您用 -- 在参数前进行测试, 它都会在 HOOK 之前设置环境变量
if (process.env.BEFORE_HOOK) {
  // do something here
}
然后用 -- 前执行测试
gapi test --before
此命令将启动 root/ src/ test.ts 文件并等待进程. exit( 0) , 这样您可以在逻辑检查前自定义您 这个 链接
单位测试
import { Container } from '@rxdi/core';
import { AuthPrivateService } from './auth.service';

const authService: AuthPrivateService = Container.get(AuthPrivateService);

describe('Auth Service', () => {
  it('unit: signJWTtoken => token : Should sucessfully sign jwt', async (done) => {
    const token = authService.signJWTtoken({
      email: '[email protected]',
      id: 1,
      scope: ['ADMIN'],
    });
    expect(token).toBeTruthy();
    const verifyedToken = authService.verifyToken(token);
    expect(verifyedToken.email).toBe('[email protected]');
    expect(verifyedToken.id).toBe(1);
    expect(verifyedToken.scope[0]).toBe('ADMIN');
    done();
  });
});
基本和先进实例内的综合测试工具E2E测试
文件路径 : root/src/app/user/user-queries.controller.e2e.spec.ts
import { Container } from '@rxdi/core';
import { IQuery } from '../core/api-introspection/index';
import { TestUtil } from '../core/test-util/testing.service';
import { map } from 'rxjs/operators';

const testUtil: TestUtil = Container.get(TestUtil);

describe('User Queries Controller', () => {
  it('e2e: queries => (findUser) : Should sucessfully find user', async (done) => {
    testUtil
      .sendRequest<IQuery>({
        query: `
        query findUser($id: Int!) {
            findUser(id: $id) {
                id
                settings {
                    username
                    firstname
                }
            }
        }
      `,
        variables: {
          id: 1,
        },
      })
      .pipe(
        map((res) => {
          expect(res.success).toBeTruthy();
          return res.data.findUser;
        }),
      )
      .subscribe(
        async (res) => {
          expect(res.id).toBe(1);
          expect(res.settings.username).toBe('o');
          expect(res.settings.firstname).toBe('pesho');
          done();
        },
        (err) => {
          expect(err).toBe(null);
          done();
        },
      );
  });
});
效果
import { Effect } from '@rxdi/core';
import { OfType } from '@rxdi/graphql';
import { EffectTypes } from '../core/api-introspection/EffectTypes';

@Effect()
export class UserEffects {
  @OfType<EffectTypes>(EffectTypes.login)
  findUser(result, payload, context) {
    console.log(result, payload, context);
  }
}
怎么样?
当应用程序启动时,整个计划通过Gapi Captallers内部应用的装饰器来收集。 现在,当我们收集了我们的计划, 靴子绑定完成后,下一步是 将所有的行为观测器 附加到特定的解析器上, 从这个步骤,我们得到了基于 Type 的字符串字符表 a.k.a Gapi Effects。 他们看起来像:
function strEnum<T extends string>(o: Array<T>): { [K in T]: K } {
  return o.reduce((res, key) => {
    res[key] = key;
    return res;
  }, Object.create(null));
}
export const EffectTypes = strEnum([
  'myevent',
  'login',
  'subscribeToUserMessagesBasic',
  'subscribeToUserMessagesWithFilter',
  'destroyUser',
  'updateUser',
  'addUser',
  'publishSignal',
]);
export type EffectTypes = keyof typeof EffectTypes;
模块内导入差距效果
import { Module } from '@rxdi/core';
import { UserQueriesController } from './user-queries.controller';
import { UserSubscriptionsController } from './user-subscriptions.controller';
import { UserMutationsController } from './user-mutations.controller';
import { UserService } from './services/user.service';
import { AnotherService } from './services/another.service';
import { UserEffects } from './user.effects';

@Module({
  controllers: [
    UserQueriesController,
    UserSubscriptionsController,
    UserMutationsController,
  ],
  services: [UserService, AnotherService],
  effects: [UserEffects],
})
export class UserModule {}
如果您想要为特定解析器创建自定义效果, 您需要使用 @ effectName ('myevent') 装饰器取字符串 此装饰器将覆盖默认事件, 即本示例中“ 方法” 的名称将查找用户
  @Type(UserType)
  @EffectName('myevent')
  @Query({
    id: {
      type: new GraphQLNonNull(GraphQLInt)
    }
  })
  findUser(root, { id }, context) {
    return {
      id: 1
    };
  }
如果您点击 Save app 将自动重新装入, 您将会在自动生成的 EffectTypes 内进行输入 然后用新的Typo生成的"我的活"锁上
  @Type(UserType)
  @EffectName(EffectTypes.myevent)
  @Query({
    id: {
      type: new GraphQLNonNull(GraphQLInt)
    }
  })
  findUser(root, { id }, context) {
    return {
      id: 1
    };
  }
效果的目的是在特定解析器被成功触发后建立逻辑,而不出现出错,例如:
- 创建关于 API 使用情况的 analitics
- 发布消息给 RabbitMQ 队列, 并保存到另一个漏斗或微服务中
- 为 UI/ UX 创建后效果, 例如当用户登录时, 您可以为用户触发一些 Push 通知 .
- 包括:.
插件
如何向系统注册插件 .
插件和服务的不同之处在于,如果存在,系统将触发构建器内部的登记方法,
否则它会解决OnInit和建筑师的属性.
这样你就可以在一切被拖走后,将自己的插件注册到系统.
如果你决定返回 承诺 register 并在设置 Timeout( () QQresolve( data) ) 内解决它, 1000 个应用程序将等待承诺的实现 .
import { Module, Plugin, Service, PluginInterface } from '@rxdi/core';
import { HAPI_SERVER } from '@rxdi/hapi';
import { Server } from '@hapi/hapi';

@Service()
export class TestService {
  testMethod() {
    return 'Hello world';
  }
}

@Plugin()
export class MyHapiPlugin implements PluginInterface {
  name = 'MyPlugin';
  version = '1.0.0';

  constructor(
    private testService: TestService,
    @Inject(HAPI_SERVER) private server: Server,
  ) {}

  async register() {
    this.server.route({
      method: 'GET',
      path: '/test',
      handler: this.handler.bind(this),
    });
  }

  async handler(request, h) {
    return this.testService.helloWorld();
  }
}

@Module({
  plugins: [MyHapiPlugin],
  services: [TestService],
})
export class AppModule {}
模块 Root 配置
import { Module, ModuleWithServices, InjectionToken } from '@rxdi/core';
import { of } from 'rxjs';

@Service()
export class MODULE_DI_CONFIG {
  text: string = 'Hello world';
}

const MY_MODULE_CONFIG = new InjectionToken<MODULE_DI_CONFIG>(
  'my-module-config',
);

@Module({
  imports: [],
})
export class YourModule {
  public static forRoot(): ModuleWithServices {
    return {
      module: YourModule,
      services: [
        { provide: MY_MODULE_CONFIG, useValue: { text: 'Hello world' } },
        { provide: MY_MODULE_CONFIG, useClass: MODULE_DI_CONFIG },
        {
          provide: MY_MODULE_CONFIG,
          useFactory: () => ({ text: 'Hello world' }),
        },
        {
          provide: MY_MODULE_CONFIG,
          lazy: true, // Will be evaluated and resolved if false will remain Promise
          useFactory: async () =>
            await Promise.resolve({ text: 'Hello world' }),
        },
        {
          provide: MY_MODULE_CONFIG,
          lazy: true, // Will be evaluated and resolved if false will remain Observable
          useFactory: () => of({ text: 'Hello world' }),
        },
        {
          // this example will download external module from link and save it inside node modules
          // then will load it inside createUniqueHash token or MY_MODULE_CONFIG.
          provide: MY_MODULE_CONFIG,
          useDynamic: {
            fileName: 'createUniqueHash',
            namespace: '@helpers',
            extension: 'js',
            typings: '',
            outputFolder: '/node_modules/',
            link: 'https://ipfs.infura.io/ipfs/QmdQtC3drfQ6M6GFpDdrhYRKoky8BycKzWbTkc4NEzGLug',
          },
        },
      ],
    };
  }
}
(#亚马逊服务器)
Amazon 无服务器
主内.ts
import { AppModule } from './app/app.module';
import { BootstrapFramework, Container } from '@rxdi/core';
import { FrameworkImports } from './framework-imports';
import { format } from 'url';
import { HAPI_SERVER } from '@rxdi/hapi';
import { Server } from '@hapi/hapi';

const App = BootstrapFramework(AuthMicroserviceModule, [FrameworkImports], {
  init: true,
}).toPromise();

export const handler = async (event, context, callback) => {
  const app = await App;
  const url = format({
    pathname: event.path,
    query: event.queryStringParameters,
  });
  const options = {
    method: event.httpMethod,
    url,
    payload: event.body,
    headers: event.headers,
    validate: false,
  };
  let res = {
    statusCode: 502,
    result: null,
  };
  try {
    res = await Container.get<Server>(HAPI_SERVER).inject(options);
  } catch (e) {
    console.error(JSON.stringify(e));
  }
  const headers = Object.assign({
    'Access-Control-Allow-Origin': '*',
    'Access-Control-Allow-Methods': 'DELETE,GET,HEAD,OPTIONS,PATCH,POST,PUT',
  });
  return {
    statusCode: res.statusCode,
    body: res.result,
    headers,
  };
};
无服务器离线
如果我们想使用 AWS Lambdas 离线, 我们需要将 RandomPort 设置在 HapiConfig 内部的真实性, 因为 HAPI 将每次都产生 随机PORT , 就我所知 Lambas 是独立的服务器, 每当有人执行该特定功能时, 都会启动它 。 因此,当运行下线时,它不会说端口9000是用另一个服务器打开的.
import { AppModule } from './app/app.module';
import { BootstrapFramework } from '@rxdi/core';
import { CoreModule } from '@gapi/core';

const GapiCoreModule = CoreModule.forRoot({
  server: {
    randomPort: true,
    hapi: {
      port: 9000,
    },
  },
  graphql: {
    path: '/graphql',
    writeEffects: false,
    graphqlOptions: {
      schema: null,
    },
  },
});
BootstrapFramework(AppModule, [GapiCoreModule], {
  init: false,
  initOptions: {
    effects: true,
    plugins: true,
    services: true,
    controllers: true,
  },
  logger: {
    logging: true,
    date: true,
    exitHandler: true,
    fileService: true,
    hashes: true,
  },
}).subscribe(
  () => console.log('Started!'),
  (e) => console.error(e),
);
Lambdas 无法使用 Typescript, 因此我们需要将我们的应用程序编译为 es6 作为 commonjs 模块
tsc
创建无服务器的. yml
service: gapi-serverless
provider:
  name: aws
  runtime: nodejs8.10
  stage: development
  profile: default
  region: us-east-2

functions:
  root:
    handler: src/main.handler
    events:
      - http:
          path: '/{proxy+}'
          method: any
          cors: true
          integration: lambda-proxy

plugins:
  - serverless-offline
然后我们就可以跑
serverless deploy
稍后您可以创建 PROXY 服务器,并将所有已存在的 Lambdas 映射为单一的 GRAPHQL Schema
import { Module } from '@rxdi/core';
import { MicroserviceModule } from '@gapi/microservices';
import { CoreModule } from './core/core.module';

@Module({
  imports: [
    CoreModule,
    MicroserviceModule.forRoot([
      {
        name: 'microservice1',
        link: 'https://hkzdqnc1i2.execute-api.us-east-2.amazonaws.com/development/graphql',
      },
    ]),
  ],
})
export class AppModule {}
(#gapi-配置) (中文(简体) )
配置
自 1. 0.0版本起, @gapi micrated to @rxdi 在配置上有一些小改动 @gapi现在使用 @rxdi/ 核心基础设施, 因此它是在其上方创建的框架 此 @gapi/ 核心模块是来自 @rxdi 基础设施的3个模块的包装: @rxdi/graphql, @rxdi/graphql-pubsub, @rxdi/hapi 当您安装 @gapi/core时, 将自动安装这3个模块, 并在 @gapi/core模块内安装 CoreModule 默认配置, 此模块导出 { CoreModule } 例如 :
const DEFAULT_CONFIG = {
    server: {
        hapi: {
            port: 9000
        },
    },
    graphql: {
        path: '/graphql',
        writeEffects: true,
        watcherPort: '',
        graphqlOptions: {
            schema: null
        }
    },
};
...
完整示例可以检查 这里
如果我们不想使用默认配置, 则基于此更改
BootstrapFramework(AppModule, [CoreModule]).subscribe();
我们需要增加更复杂的配置 并称之为框架进口 我们的配置将生活 此模块将在 AppModule 拖曳前被导入 .
import { CoreModule, Module } from '@gapi/core';
import { AuthService } from './app/core/services/auth/auth.service';
import { AuthModule } from '@gapi/auth';
import { readFileSync } from 'fs';

@Module({
  imports: [
    AuthModule.forRoot({
      algorithm: 'HS256',
      cert: readFileSync('./cert.key'),
      cyper: {
        algorithm: 'aes256',
        iv: 'Jkyt1H3FA8JK9L3B',
        privateKey: '8zTVzr3p53VC12jHV54rIYu2545x47lA',
      },
    }),
    CoreModule.forRoot({
      server: {
        hapi: {
          port: process.env.API_PORT || process.env.PORT || 9000,
        },
      },
      pubsub: {
        authentication: AuthService,
      },
      graphql: {
        path: process.env.GRAPHQL_PATH,
        watcherPort: 8967,
        writeEffects: process.env.WRITE_EFFECTS === 'true' ? true : false,
        authentication: AuthService,
        graphqlOptions: {
          schema: null,
        },
      },
    }),
  ],
})
export class FrameworkImports {}
现在你可以导入 FrameworkImports
import { BootstrapFramework } from '@rxdi/core';
import { FrameworkImports } from './framework-imports';
import { AppModule } from './app/app.module';

BootstrapFramework(AppModule, [FrameworkImports]).subscribe();
夹克
遵循命令将启动 RabbitMQ, PostgreSQL, API, NGINX 作为服务, 您需要安装在您的系统中 !
您可以在工程内找到更多信息 基础 或者说 高级 文档
API服务于https://localhost:80和https://localhost:80/订阅
您的自定义证书可以在此添加“ root/nginx/ certs/ cert. key ” “ root/nginx/ certs/ cert. pem ”
要用 Docker 类型构建工程 :
gapi app build
要启动 Docker 类型的工程 :
gapi app start
要停止项目类型 :
gapi app stop
工人
所有工人都将被定位为代理,并将重新被定位为https://localhost:80和https://localhost:80/订阅
所以,你不必担心 如果你的一些工人停止响应
待办事宜: 建立对所有工人和主要API的监测
要开始工人类型 :
gapi workers start
停止工人类型:
gapi workers stop
从零开始创建应用程序并自定义自定义拖带,而不包含 CLI
创建类似 root/ src/ app 的文件夹结构
类似上面的例子创建 AppModule
将用户模块输入 AppModule 内导入
文件夹 root/sc/app/app.module.ts
import { Module } from '@rxdi/core';
import { UserModule } from './user/user.module';
import { CoreModule } from './core/core.module';

@Module({
  imports: [UserModule, CoreModule],
})
export class AppModule {}
创建模块 UserModule , 用于输入我们创建的控制器
文件夹根/src/app/用户/用户.module.ts
import { Module } from '@rxdi/core';
import { UserQueriesController } from './user-queries.controller';
import { UserSubscriptionsController } from './user-subscriptions.controller';
import { UserMutationsController } from './user-mutations.controller';
import { UserService } from './services/user.service';
import { AnotherService } from './services/another.service';
import { UserEffect } from './user.effect';

@Module({
  controllers: [
    UserQueriesController,
    UserSubscriptionsController,
    UserMutationsController,
  ],
  services: [UserService, AnotherService],
  effects: [UserEffect],
})
export class UserModule {}
定义用户类型方案
文件夹根/src/用户/类型/用户.type.ts
您可以自定义来自 schema 的每个解析器, 您可以用 @ Gapi Object 创建嵌入式 semas 类型装饰器
用户Schema
请注意, 您可以通过 @ Resolve( 用于在构建器内定义的修改器的密钥) 修改响应结果
Root是预览解析器的值,例如root.id='1';
当您从 @ Resolve 装饰根返回一些值时 。 ID 将被替换为返回值, 以例为 5
如果您移除了 @ Resolve 装饰器, 它将会从第一个根解析器返回值
import { GapiObjectType, Resolve, InjectType } from '@rxdi/graphql';
import { GraphQLScalarType, GraphQLInt, GraphQLString } from 'graphql';
import { UserSettings } from './user.settings';

@GapiObjectType()
export class UserType {
  readonly id: number | GraphQLScalarType = GraphQLInt;
  readonly email: string | GraphQLScalarType = GraphQLString;
  readonly type: string | GraphQLScalarType = GraphQLString;
  readonly password: string | GraphQLScalarType = GraphQLString;
  readonly name: string | GraphQLScalarType = GraphQLString;
  readonly settings: UserSettings = InjectType(UserSettings);

  @Resolve('id')
  getId?(root, payload, context) {
    return 1;
  }
}
用户设置Schema
import { Injector } from '@rxdi/core';
import { GapiObjectType, Resolve } from '@rxdi/graphql';
import { AnotherService } from '../services/another.service';
import { GraphQLScalarType, GraphQLBoolean } from 'graphql';

@GapiObjectType()
export class UserSettings {
  @Injector(AnotherService) private anotherService?: AnotherService;

  readonly sidebar: boolean | GraphQLScalarType = GraphQLBoolean;

  @Resolve('sidebar')
  async getSidebar?(root, payload, context) {
    return await this.anotherService.returnTrueAsync();
  }
}
用于订阅的用户信息Schema
import { GapiObjectType } from '@rxdi/graphql';
import { GraphQLScalarType, GraphQLString } from 'graphql';

@GapiObjectType()
export class UserMessage {
  readonly message: string | GraphQLScalarType = GraphQLString;
}
用户端
import { GapiObjectType, InjectType } from '@rxdi/graphql';
import { UserType } from './user.type';
import { GraphQLScalarType, GraphQLString } from 'graphql';

@GapiObjectType()
export class UserTokenType {
  readonly token: string | GraphQLScalarType = GraphQLString;
  readonly user: UserType = InjectType(UserType);
}
查询
文件夹根/src/用户/query.controller.ts
import { Controller } from '@rxdi/core';
import { Type, Query, Public } from '@rxdi/graphql';
import { GraphQLNonNull, GraphQLInt, GraphQLString } from 'graphql';
import { UserService } from './services/user.service';
import { UserType } from './types/user.type';
import { UserTokenType } from './types/user-login.type';
import { AuthPrivateService } from '../core/services/auth/auth.service';
import { IUserType, IUserTokenType } from '../core/api-introspection/index';

@Controller()
export class UserQueriesController {
  constructor(
    private userService: UserService,
    private authService: AuthPrivateService,
  ) {}

  @Type(UserType)
  @Public()
  @Query({
    id: {
      type: new GraphQLNonNull(GraphQLInt),
    },
  })
  findUser(root, { id }, context): IUserType {
    return this.userService.findUser(id);
  }

  @Type(UserTokenType)
  @Public()
  @Query({
    email: {
      type: new GraphQLNonNull(GraphQLString),
    },
    password: {
      type: new GraphQLNonNull(GraphQLString),
    },
  })
  login(root, { email, password }, context) {
    let credential: IUserTokenType;

    // Find user from database
    const user = <IUserType>{
      id: 1,
      email: email,
      type: 'ADMIN',
      settings: {
        sidebar: true,
      },
      password: this.authService.encryptPassword(password),
      name: 'Test Testov',
    };

    if (this.authService.decryptPassword(user.password) === password) {
      credential = {
        user: user,
        token: this.authService.signJWTtoken({
          email: user.email,
          id: user.id,
          scope: [user.type],
        }),
      };
    } else {
      throw new Error('missing-username-or-password');
    }
    return credential;
  }
}
变异
文件夹根/src/用户/mutation.controller.ts
import { Controller } from '@rxdi/core';
import { UserService } from './services/user.service';
import { UserType } from './types/user.type';
import { UserMessage } from './types/user-message.type';
import { IUserType } from '../core/api-introspection';
import { PubSubService } from '@rxdi/graphql-pubsub';
import { Scope, Type, Mutation, Public } from '@rxdi/graphql';
import { GraphQLNonNull, GraphQLString, GraphQLInt } from 'graphql';

@Controller()
export class UserMutationsController {
  constructor(
    private userService: UserService,
    private pubsub: PubSubService,
  ) {}

  @Scope('ADMIN')
  @Type(UserMessage)
  @Public()
  @Mutation({
    message: {
      type: new GraphQLNonNull(GraphQLString),
    },
    signal: {
      type: new GraphQLNonNull(GraphQLString),
    },
  })
  publishSignal(root, { message, signal }, context): UserMessage {
    console.log(
      `${signal} Signal Published message: ${message} by ${context.email}`,
    );
    this.pubsub.publish(
      signal,
      `${signal} Signal Published message: ${message} by ${context.email}`,
    );
    return { message };
  }

  @Scope('ADMIN')
  @Type(UserType)
  @Mutation({
    id: {
      type: new GraphQLNonNull(GraphQLInt),
    },
  })
  deleteUser(root, { id }, context): IUserType {
    return this.userService.deleteUser(id);
  }

  @Scope('ADMIN')
  @Type(UserType)
  @Mutation({
    id: {
      type: new GraphQLNonNull(GraphQLInt),
    },
  })
  updateUser(root, { id }, context): IUserType {
    return this.userService.updateUser(id);
  }

  @Scope('ADMIN')
  @Type(UserType)
  @Mutation({
    id: {
      type: new GraphQLNonNull(GraphQLInt),
    },
  })
  addUser(root, { id }, context): IUserType {
    return this.userService.addUser(id);
  }
}
订阅
文件夹根/ sc/ 用户/ 用户. 订阅. controller.ts
import { Controller } from '@rxdi/core';
import { Type, Scope, Public } from '@rxdi/graphql';
import { withFilter } from 'graphql-subscriptions';
import { GraphQLNonNull, GraphQLInt } from 'graphql';
import { PubSubService, Subscribe, Subscription } from '@rxdi/graphql-pubsub';
import { UserMessage } from './types/user-message.type';

@Controller()
export class UserSubscriptionsController {
  constructor(private pubsub: PubSubService) {}

  @Scope('ADMIN')
  @Type(UserMessage)
  @Public()
  @Subscribe((self: UserSubscriptionsController) =>
    self.pubsub.asyncIterator('CREATE_SIGNAL_BASIC'),
  )
  @Subscription()
  subscribeToUserMessagesBasic(message): UserMessage {
    return { message };
  }

  @Scope('ADMIN')
  @Type(UserMessage)
  @Subscribe(
    withFilter(
      (self: UserSubscriptionsController) =>
        self.pubsub.asyncIterator('CREATE_SIGNAL_WITH_FILTER'),
      (payload, { id }, context) => {
        console.log('Subscribed User: ', id, JSON.stringify(context));
        return true;
      },
    ),
  )
  @Subscription({
    id: {
      type: new GraphQLNonNull(GraphQLInt),
    },
  })
  subscribeToUserMessagesWithFilter(message): UserMessage {
    return { message };
  }
}
基本订阅查询示例
subscription {
  subscribeToUserMessagesBasic {
    message
  }
}
使用Filter 的订阅查询示例
subscription {
  subscribeToUserMessagesWithFilter(id:1)  {
    message
  }
}
用 @ Service 装饰器创建服务
文件夹根/src/用户/服务/用户. service.ts
import { Service } from '@rxdi/core';
import { IUserType } from '../../core/api-introspection';

@Service()
export class AnotherService {
  trimFirstLetter(username: string): string {
    return username.charAt(1);
  }

  trimFirstLetterAsync(username): Promise<string> {
    return Promise.resolve(this.trimFirstLetter(username));
  }

  returnTrueAsync() {
    return Promise.resolve(true);
  }
}

@Service()
export class UserService {
  constructor() {}

  findUser(id: number): IUserType {
    return {
      id: 1,
      email: '[email protected]',
      type: 'ADMIN',
      password: '123456',
      name: 'Pesho',
      settings: {
        sidebar: true,
      },
    };
  }

  addUser(id: number): IUserType {
    return {
      id: 1,
      email: '[email protected]',
      type: 'ADMIN',
      password: '123456',
      name: 'Pesho',
      settings: {
        sidebar: true,
      },
    };
  }

  deleteUser(id: number): IUserType {
    return {
      id: 1,
      email: '[email protected]',
      type: 'ADMIN',
      password: '123456',
      name: 'Pesho',
      settings: {
        sidebar: true,
      },
    };
  }

  updateUser(id): IUserType {
    return {
      id: 1,
      email: '[email protected]',
      type: 'ADMIN',
      password: '123456',
      name: 'Pesho',
      settings: {
        sidebar: true,
      },
    };
  }
}
最后启动您的应用程序
文件夹根/ src/ main. ts
import { AppModule } from './app/app.module';
import { BootstrapFramework } from '@rxdi/core';
import { CoreModule } from '@gapi/core';

BootstrapFramework(AppModule, [CoreModule], {
  init: false,
  initOptions: {
    effects: true,
    plugins: true,
    services: true,
    controllers: true,
  },
  logger: {
    logging: true,
    date: true,
    exitHandler: true,
    fileService: true,
    hashes: true,
  },
}).subscribe(
  () => console.log('Started!'),
  (e) => console.error(e),
);
在 repo 的根文件夹内启动您的应用程序
重要的脚本将在 root/src/main.ts 中搜索主.ts, 在那里我们拖住我们的模块起伏
gapi start
基本认证
创建核心模块
文件夹根/src/app/core/core.module.ts
import { Module } from '@rxdi/core';
import { AuthPrivateService } from './services/auth/auth.service';

@Module({
  services: [AuthPrivateService],
})
export class CoreModule {}
创建私人 AuthService@ Service () 这是完整的订阅 Query Mutation 通过单一方法“ validateToken () ” 认证
上面有GapiAuth模块的示例方法,用于加密和解密用户密码
文件夹 root/src/app/core/ services/auth/auth.services
import { Service } from '@rxdi/core';
import * as Boom from 'boom';

export interface UserInfo {
  scope: ['ADMIN', 'USER'];
  type: 'ADMIN' | 'USER';
  iat: number;
}

@Service()
export class AuthPrivateService {
  constructor() {
    // private connectionHookService: ConnectionHookService // private authService: AuthService,
    // this.connectionHookService.modifyHooks.onSubConnection = this.onSubConnection.bind(this);
    // this.authService.modifyFunctions.validateToken = this.validateToken.bind(this);
  }

  onSubConnection(connectionParams): UserInfo {
    if (connectionParams.token) {
      return this.validateToken(connectionParams.token, 'Subscription');
    } else {
      throw Boom.unauthorized();
    }
  }

  validateToken(
    token: string,
    requestType: 'Query' | 'Subscription' = 'Query',
  ): UserInfo {
    const user = <UserInfo>this.verifyToken(token);
    user.type = user.scope[0];
    console.log(`${requestType} from: ${JSON.stringify(user)}`);
    if (user) {
      return user;
    } else {
      throw Boom.unauthorized();
    }
  }

  verifyToken(token: string): any {
    // return this.authService.verifyToken(token);
    return token;
  }

  signJWTtoken(tokenData: any): any {
    // return this.authService.sign(tokenData);
    return tokenData;
  }

  issueJWTToken(tokenData: any) {
    // const jwtToken = this.authService.sign({
    //     email: '',
    //     id: 1,
    //     scope: ['ADMIN', 'USER']
    // });
    // return jwtToken;
  }

  decryptPassword(password: string): any {
    // return this.authService.decrypt(password);
    return password;
  }

  encryptPassword(password: string): any {
    // return this.authService.encrypt(password);
    return password;
  }
}
最后导入 AppModule 内的核心模块
import { Module } from '@rxdi/core';
import { UserModule } from './user/user.module';
import { UserService } from './user/services/user.service';
import { CoreModule } from './core/core.module';

@Module({
  imports: [UserModule, CoreModule],
})
export class AppModule {}
依赖性注射
import { Module, InjectionToken } from '@rxdi/core';
import { UserModule } from './user/user.module';
import { CoreModule } from './core/core.module';

class UserId {
  id: number;
}

export const UserIdToken = new InjectionToken<UserId>('UserId');

@Module({
  imports: [UserModule, CoreModule],
  services: [
    {
      provide: 'UserId',
      useValue: { id: 1 },
    },
    {
      provide: UserIdToken,
      useFactory: () => {
        return { id: 1 };
      },
    },
    {
      provide: UserIdToken,
      useClass: UserId,
    },
  ],
})
export class AppModule {}
@Controller()
export class UserQueriesController {
  constructor(
    @Inject('UserId') private userId: { id: number }, // Value injection
    @Inject(UserIdToken) private userId: UserId, // Token injection
    @Inject(UserIdToken) private userId: UserId, // Class injection
  ) {
    console.log(this.userId.id);
    // Will print 1
  }
}
也可以将可观察值作为值
import { Module } from '@rxdi/core';
import { UserModule } from './user/user.module';
import { CoreModule } from './core/core.module';
import { BehaviorSubject } from 'rxjs/BehaviorSubject';

@Module({
  imports: [UserModule, CoreModule],
  services: [
    {
      provide: 'Observable',
      useValue: new BehaviorSubject(1),
    },
  ],
})
export class AppModule {}
然后在您的应用程序中注入此服务
import { Controller } from '@rxdi/core';
import { BehaviorSubject } from 'rxjs/BehaviorSubject';
import { PubSubService } from '@rxdi/graphql-pubsub';

@Controller()
export class UserSubscriptionsController {
  constructor(
    @Inject('Observable') private observable: BehaviorSubject<number>,
    private pubsub: PubSubService,
  ) {
    this.observable.subscribe(() =>
      this.pubsub.publish(
        'CREATE_SIGNAL_BASIC',
        `Signal Published message: ${this.observable.getValue()}`,
      ),
    );
  }
}
然后你可以把它放在另一个服务 并释放价值
import { Service, Inject } from '@rxdi/core';
import { BehaviorSubject } from 'rxjs/BehaviorSubject';
import { TimerObservable } from 'rxjs/observable/TimerObservable';

@Service()
export class UserService {
    constructor(
        @Inject('Observable') private observable: BehaviorSubject<number>
    ) {
        TimerObservable.create(0, 1000).subscribe((t) => this.observable.next(t))
    }
交叉参考通知依赖性
import { UserService } from './user.service';

@Service()
export class AnotherService {
    @Inject(() => UserService) private userService: UserService
import { AnotherService } from './another.service';

@Service()
export class UserService {
    @Inject(() => AnotherService) private anotherService: AnotherService
您可以在 Altair dev 面板内订阅基本面板时看到订阅
subscription {
  subscribeToUserMessagesBasic {
    message
  }
}
结果是
{
  "subscribeToUserMessagesBasic": {
    "message": "Signal Published message: 495"
  }
}
具有同类型嵌入式图案的复杂计划对象
import { GapiObjectType, InjectType, Resolve, Type } from '@rxdi/graphql';
import {
  GraphQLGapiObjectType,
  GraphQLString,
  GraphQLInt,
  GraphQLList,
  GraphQLBoolean,
  GraphQLScalarType,
} from 'graphql';

@GapiObjectType()
export class UserSettingsType {
  readonly id: number | GraphQLScalarType = GraphQLInt;
  readonly color: string | GraphQLScalarType = GraphQLString;
  readonly language: string | GraphQLScalarType = GraphQLString;
  readonly sidebar: boolean | GraphQLScalarType = GraphQLBoolean;
}

@GapiObjectType()
export class UserWalletSettingsType {
  readonly type: string | GraphQLScalarType = GraphQLString;
  readonly private: string | GraphQLScalarType = GraphQLString;
  readonly security: string | GraphQLScalarType = GraphQLString;
  readonly nested: UserSettingsType = InjectType(UserSettingsType);
  readonly nested2: UserSettingsType = InjectType(UserSettingsType);
  readonly nested3: UserSettingsType = InjectType(UserSettingsType);

  // If you want you can change every value where you want with @Resolve decorator
  @Resolve('type')
  changeType(root, args, context) {
    return root.type + ' new-type';
  }

  // NOTE: you can name function methods as you wish can be Example3 for example important part is to define 'nested3' as a key to map method :)
  @Resolve('nested3')
  Example3(root, args, context) {
    // CHANGE value of object type when returning
    // UserSettingsType {
    //     "id": 1,
    //     "color": "black",
    //     "language": "en-US",
    //     "sidebar": true
    // }
    // root.nested3.id
    // root.nested3.color
    // root.nested3.language
    // root.nested3.sidebar
    return root.nested3;
  }
}

@GapiObjectType()
export class UserWalletType {
  readonly id: number | GraphQLScalarType = GraphQLInt;
  readonly address: string | GraphQLScalarType = GraphQLString;
  readonly settings: string | UserWalletSettingsType = InjectType(
    UserWalletSettingsType,
  );
}

@GapiObjectType()
export class UserType {
  readonly id: number | GraphQLScalarType = GraphQLInt;
  readonly email: string | GraphQLScalarType = GraphQLString;
  readonly firstname: string | GraphQLScalarType = GraphQLString;
  readonly lastname: string | GraphQLScalarType = GraphQLString;
  readonly settings: string | UserSettingsType = InjectType(
    UserWalletSettingsType,
  );
  readonly wallets: UserWalletType = new GraphQLList(
    InjectType(UserWalletType),
  );
}
从 altair dev 工具创建这样的查询
query {
  findUser(id:1) {
    id
    email
     firstname
     lastname
    settings {
      id
      color
      language
      sidebar
    }
    wallets {
      id
      address
      settings {
        type
        private
        security
        nested {
          id
          color
          language
          sidebar
        }
        nested2 {
          id
          color
          language
          sidebar
        }
        nested3 {
          id
          color
          language
          sidebar
        }
      }
    }
  }
}
此查询应答上面的计程器
   findUser(id: number): UserType {
        return {
            id: 1,
            email: "[email protected]",
            firstname: "Kristiyan",
            lastname: "Tachev",
            settings: {
                id: 1,
                color: 'black',
                language: 'en-US',
                sidebar: true
            },
            wallets: [{
                id: 1, address: 'dadadada', settings: {
                    type: "ethereum",
                    private: false,
                    security: "TWO-STEP",
                    nested: {
                        id: 1,
                        color: 'black',
                        language: 'en-US',
                        sidebar: true
                    },
                    nested2: {
                        id: 1,
                        color: 'black',
                        language: 'en-US',
                        sidebar: true
                    },
                    nested3: {
                        id: 1,
                        color: 'black',
                        language: 'en-US',
                        sidebar: true
                    },
                    nested4: {
                        id: 1,
                        color: 'black',
                        language: 'en-US',
                        sidebar: true
                    },

                }
            }]
        };
    }
图ql QL 的返回结果将是
{
  "data": {
    "findUser": {
      "id": 1,
      "email": "[email protected]",
      "firstname": "Kristiyan",
      "lastname": "Tachev",
      "settings": {
        "id": 1,
        "color": "black",
        "language": "en-US",
        "sidebar": true
      },
      "wallets": [
        {
          "id": 1,
          "address": "dadadada",
          "settings": {
            "type": "ethereum new-type",
            "private": "false",
            "security": "TWO-STEP",
            "nested": {
              "id": 1,
              "color": "black",
              "language": "en-US",
              "sidebar": true
            },
            "nested2": {
              "id": 1,
              "color": "black",
              "language": "en-US",
              "sidebar": true
            },
            "nested3": {
              "id": 1,
              "color": "black",
              "language": "en-US",
              "sidebar": true
            }
          }
        }
      ]
    }
  }
}
装饰者
所有空白装饰者
问: - 定义在方法上添加的查询对象@ captain
@ 调和 - 定义在方法上添加的变异对象@ captain
@ 订阅 - 在 @ command
@ 订阅 - 它将与 @ 订阅装饰器一起使用, 它需要 PubSublister 函数@ Sublits ( () \) 用户订阅 Captain. pubsub.asynciterator ('CREATE SIGNAL BASIC') 也可以与 Filter 一起使用
    @Subscribe(
        withFilter(
            (self: UserSubscriptionsController) => self.pubsub.asyncIterator('CREATE_SIGNAL_WITH_FILTER'),
            (payload, {id}, context) => {
                console.log('User trying to subscribe: ', id, JSON.stringify(context));
                // if user passes your expression it will be subscribed to this subscription
                return id !== context.id;
            }
        )
    )
    @Subscription()
    subscribeToUserMessagesWithFilter(message): UserMessage {
        return { message };
    }
@ 公开 - 与(@Qweery,@Mutation,订阅)一起添加属性"public = true"将使这个特定的解析器公开而不认证
@ 范围 - 能够接受像什么样的用户可以使用这个解析器@scope('ADMIN','USER','SALES')这样的参数
@ 类型 - 与(% uerry, @Mutation, 订阅) 通过对象Type 类工作, 例如 UserType 这是内部新的 GraphQL ObjectType
@ Gapi 对象类型 - 内部使用新的 GraphQL ObjectType () 添加类名作为 {name: builder.name} 可以取 {name: “ YourCustomName ”) 作为参数, 也可以使用相同的对象类型生成新的 GraphQL 输入对象 传递 {输入: true} 时键入用于参数
@ 解开 - 这在Gapi ObjectType内部使用,它与修改GraphQL的返回结果有关,如下例所示
@GapiObjectType()
export class UserType {
  id: number | GraphQLScalarType = GraphQLInt;

  @Resolve('id')
  getId?(root, payload, context) {
    return 5;
  }
}
这很重要吗? 方法需要为 OPTIONAL ,因为它将是类 UserType 定义的界面的一部分,所以如果使用 UserType , 它会要求您添加 gied 作为函数, 但我们只是想修改 Schema 的返回结果, 并使用 解析 方法装饰 .
@ 主计长 - 它将在 Gapi 应用程序内定义控制器, 当你准备在内部导入控制器时, 您可以随意拥有多少控制器 。 @ Module ({ controlers:... CONTROLLERS})
@ 守护 - 这个装饰器会在特定的解析器中添加"警卫"可以这样使用:
import { Controller } from '@rxdi/core';
import { Type, Query, Guard } from '@rxdi/graphql';
import { UserService } from './services/user.service';
import { UserListType } from './types/user-list.type';
import { AdminOnly } from '../core/guards/admin-only.guard';

@Controller()
export class UserQueriesController {
  constructor(private userService: UserService) {}

  @Type(UserListType)
  @Guard(AdminOnly)
  @Query()
  listUsers() {
    return this.userService.findAll();
  }
}
或者你可以用它们来控制
import { Query, GraphQLControllerOptions, InjectType } from '@rxdi/graphql';
import { UserService } from './services/user.service';
import { UserListType } from './types/user-list.type';
import { AdminOnly } from '../core/guards/admin-only.guard';

@Controller<GraphQLControllerOptions>({
  guards: [AdminOnly],
  type: InjectType(UserListType),
})
export class UserQueriesController {
  constructor(private userService: UserService) {}

  @Query()
  listUsers() {
    return this.userService.findAll();
  }
}
基本警卫的例子:
import {
  Service,
  CanActivateResolver,
  GenericGapiResolversType,
} from '@gapi/core';
import { ENUMS } from '../enums';
import { UserType } from '../../user/types/user.type';

@Service()
export class AdminOnly implements CanActivateResolver {
  canActivate(
    context: UserType,
    payload,
    descriptor: GenericGapiResolversType,
  ) {
    return context.type === 'ADMIN';
  }
}
有效使用的案例有:
@Service()
export class AdminOnly implements CanActivateResolver {
  canActivate(
    context: UserType,
    payload,
    descriptor: GenericGapiResolversType,
  ) {
    return Observable.create((o) => o.next(true));

    return new Promise((r) => r(true));

    return Observable.create((o) => o.next(false));

    return new Promise((r) => r(false));
    if (context.type !== 'ADMIN') {
      throw new Error('error');
    }
  }
}
如果您尝试混合 @ Guard 装饰并应用全局化的守护符, 它将会合并它们, 这样您就可以拥有两个守护符 .
@ 干扰器 - 这个抽象可以用来修改或仅仅日志结果,然后处理到客户端,这样就可以使用:
日志截取器
import {
  InterceptResolver,
  Service,
  GenericGapiResolversType,
} from '@gapi/core';
import { Observable } from 'rxjs';
import { tap } from 'rxjs/operators';
import { UserType } from '../../user/types/user.type';

@Service()
export class LoggerInterceptor implements InterceptResolver {
  intercept(
    chainable$: Observable<any>,
    context: UserType,
    payload,
    descriptor: GenericGapiResolversType,
  ) {
    console.log('Before...');
    const now = Date.now();
    return chainable$.pipe(
      tap(() => console.log(`After... ${Date.now() - now}ms`)),
    );
  }
}
然后你可以把它附在查询器、变相器、订阅器里
    @Interceptor(LoggerInterceptor)
    @Query({
        id: {
            type: new GraphQLNonNull(GraphQLString)
        }
    })
    findUser(root, { id }): Promise<User> {
        return this.userService.findUserById(id);
    }
您也可以修改结果返回
修改截取器
import {
  InterceptResolver,
  Service,
  GenericGapiResolversType,
} from '@gapi/core';
import { Observable } from 'rxjs';
import { tap } from 'rxjs/operators';
import { UserType } from '../../user/types/user.type';

@Service()
export class ModifyInterceptor implements InterceptResolver {
  intercept(
    chainable$: Observable<any>,
    context: UserType,
    payload,
    descriptor: GenericGapiResolversType,
  ) {
    console.log('Before...');
    const now = Date.now();
    return chainable$.pipe(
      map((res) => {
        console.log(`After... ${Date.now() - now}ms`);
        return res;
      }),
    );
  }
}
@ 模块 - 这是应用的起步点,当我们把模块固定在root/src/main.ts中时。 也可以用于创建另一个模块, 可以在 AppModule {importS} 内导入
@ Service (英语) - 通过类以上, 这个装饰器将插入与该类和所有寄生体内插入构造器( ) 相关的元数据, 所以应用程序启动时, 如果不是工厂服务( 将在下一期中解释如何创建工厂) , 您将会得到许多服务的单通 。 因此,您可以使用您应用程序中所有处注射的单例服务.
输入@ info - 它会给服务处注入特定的名字,例如当您使用注射Token('my-name')时,您可以做类似的事情
constructor(
    @Inject('my-name') private name: string;
) {}
@ 喷出器 - 小心点! 它会在应用程序被完全加载以加载类之前注入服务 。 类型是Gapi应用程序内装入的第一件事,所以我们需要我们处理装饰器的服务,也就是应用程序装入时的服务。 如果您可以使用内部提供的依赖注射.
@ 内插图 - 这是BETA的装饰器,现在使用时没有装饰器标志@ 例如:
@GapiObjectType()
export class UserType {
  readonly id: number | GraphQLScalarType = GraphQLInt;
  readonly settings: string | UserSettings = InjectType(UserSettingsType);
}
今后将采用如下方式:
@GapiObjectType()
export class UserType {
  readonly id: number | GraphQLScalarType = GraphQLInt;
  @InjectType(UserSettingsType) readonly settings: string;
}
TODO: 更好的文档...
享受吧! (笑声)